Vortech Dome Hole Bottom Drain Tank Installation
Installing the Bottom Drain
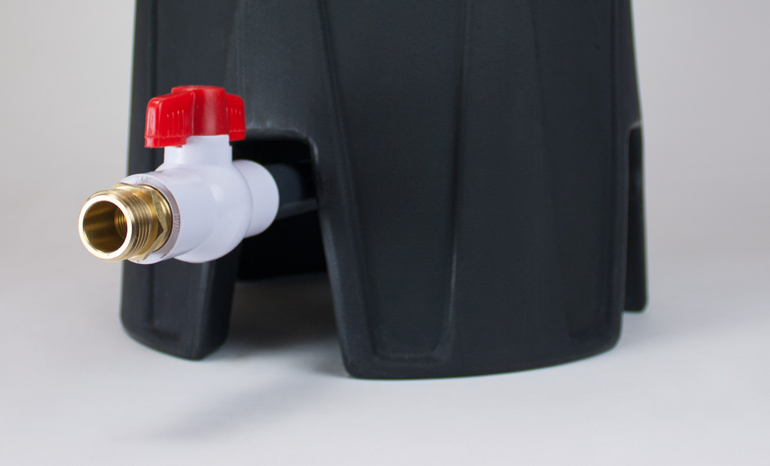
The bottom drain assembly installed.
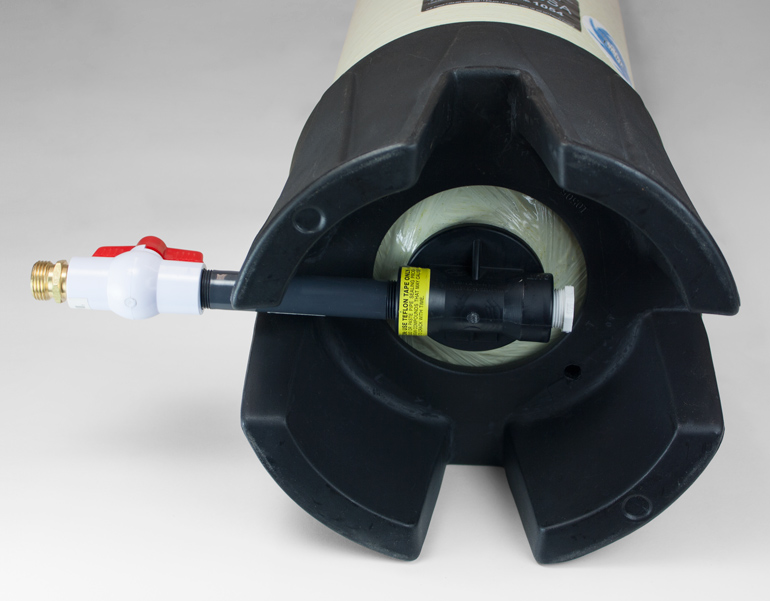
View from the bottom.
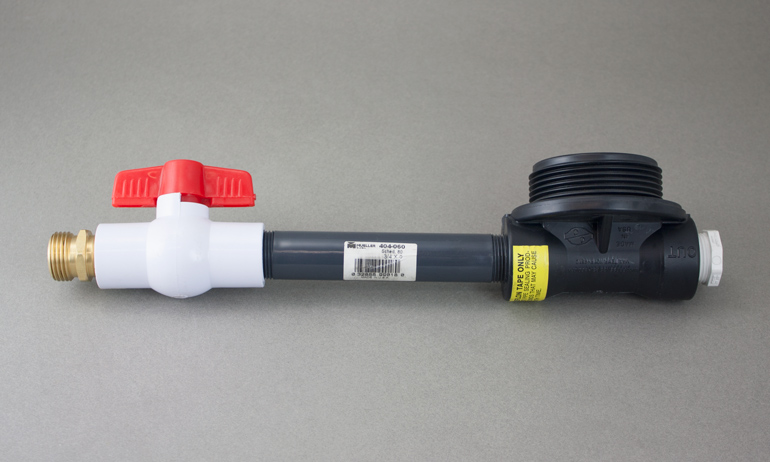
How the pieces go together.
After the tank has been removed from the box:
-
Lay the tank on its side on a table and remove the base from the bottom of the tank. This is usually accomplished easily by tapping downward on the base with a small hammer. Work around the circumference of the base, tapping until the base comes off.
-
Install the IN/OUT tank head (it should have a plug preinstalled in the “out” port) into the bottom hole of the tank and tighten until you have a firm fit. (Get it as tight as you want it now, because when the base is in place, it will be difficult to tighten it more.)
Do not tape the threads on the tank head. The seal is made by the O-ring on the head. The easy way to tighten the head is to screw the 5" pipe nipple temporarily into the empty (Out) port of the head to use as a handle. Remove the nipple when the head is installed.
-
When the head is installed, put the base back on the tank. Be sure that the hole in the IN/OUT head is centered in one of the windows on the base, because you're going to have to install the valve assembly through the window.
The easy way to reinstall the base is to start it in the correct position, then set it upright and tap it against the floor. The weight of the tank will drive the tank into the base.
-
Assemble the remainder of the system using teflon tape on all threads.
The metal garden hose fitting can be installed if you want to hook to a garden hose; if you prefer to hook to a pipe, leave the garden hose fitting off.
-
The ball valve should stay in the off position (with handles at right angles with the pipe). To drain the tank, turn off the inlet water, remove the “dome hole” plug near the top of the tank to release the vacuum, and open the drain valve.
Site Index
Filtration Systems
- Aeration for Iron & Sulfide
- Backwashing Filters
(whole house & well units)
- Chlorine & Chemical Injectors
- Countertop Water Filters
- Emergency Filters
- Garden Hose Filters
- Reverse Osmosis, Residential
- Reverse Osmosis, Commercial
- Shower Filters
- Specialty Filters
- Ultraviolet Systems
- Undersink Filters
- Water Softeners
- Whole House Filters
Cartridges
Parts
- Replacement Parts
- Faucets
- Filter Media
- Fittings
- Housings
- O-rings
- Pumps
- Pura UV
- R.O. Parts
- R.O. Tanks
- R.O. Booster Pump
- VIQUA UV